I don't think I could justify spending $15-$20 on a single Christmas tree cone from the store. There can't just be one lonely tree either; it's gotta have at least two other trees around to keep it company or else it looks awkward and out of place. So before I know it, I'd be spending $45+ on these trees, and I can think of a million other things I'd rather buy with that money. That's just how my mind works when I'm trying to determine whether something's worth purchasing. I usually end up deciding that the money would be better spent on food. Like $45? That's 45 fish tacos on dollar wednesdays! Or more like 40 because of tax, but there's been enough math in this post already.
I also have the tendency to think I can make that–even when I have no idea how. Not sure if it's because I enjoy challenging myself, or because I underestimate the task/overestimate my ability–maybe all of the above. But "I can make that" is exactly what I kept saying when my mom was trying to buy these $20 trees at Home Goods and Target. So I did make them! And the same amount of money that would've gotten me 1 tree at the store bought me enough materials to make 6 cones of my own design.
What you need to create the cone:
- poster board
- ruler
- pen/pencil
- scissors
- paper clip/binder clip
- glue gun
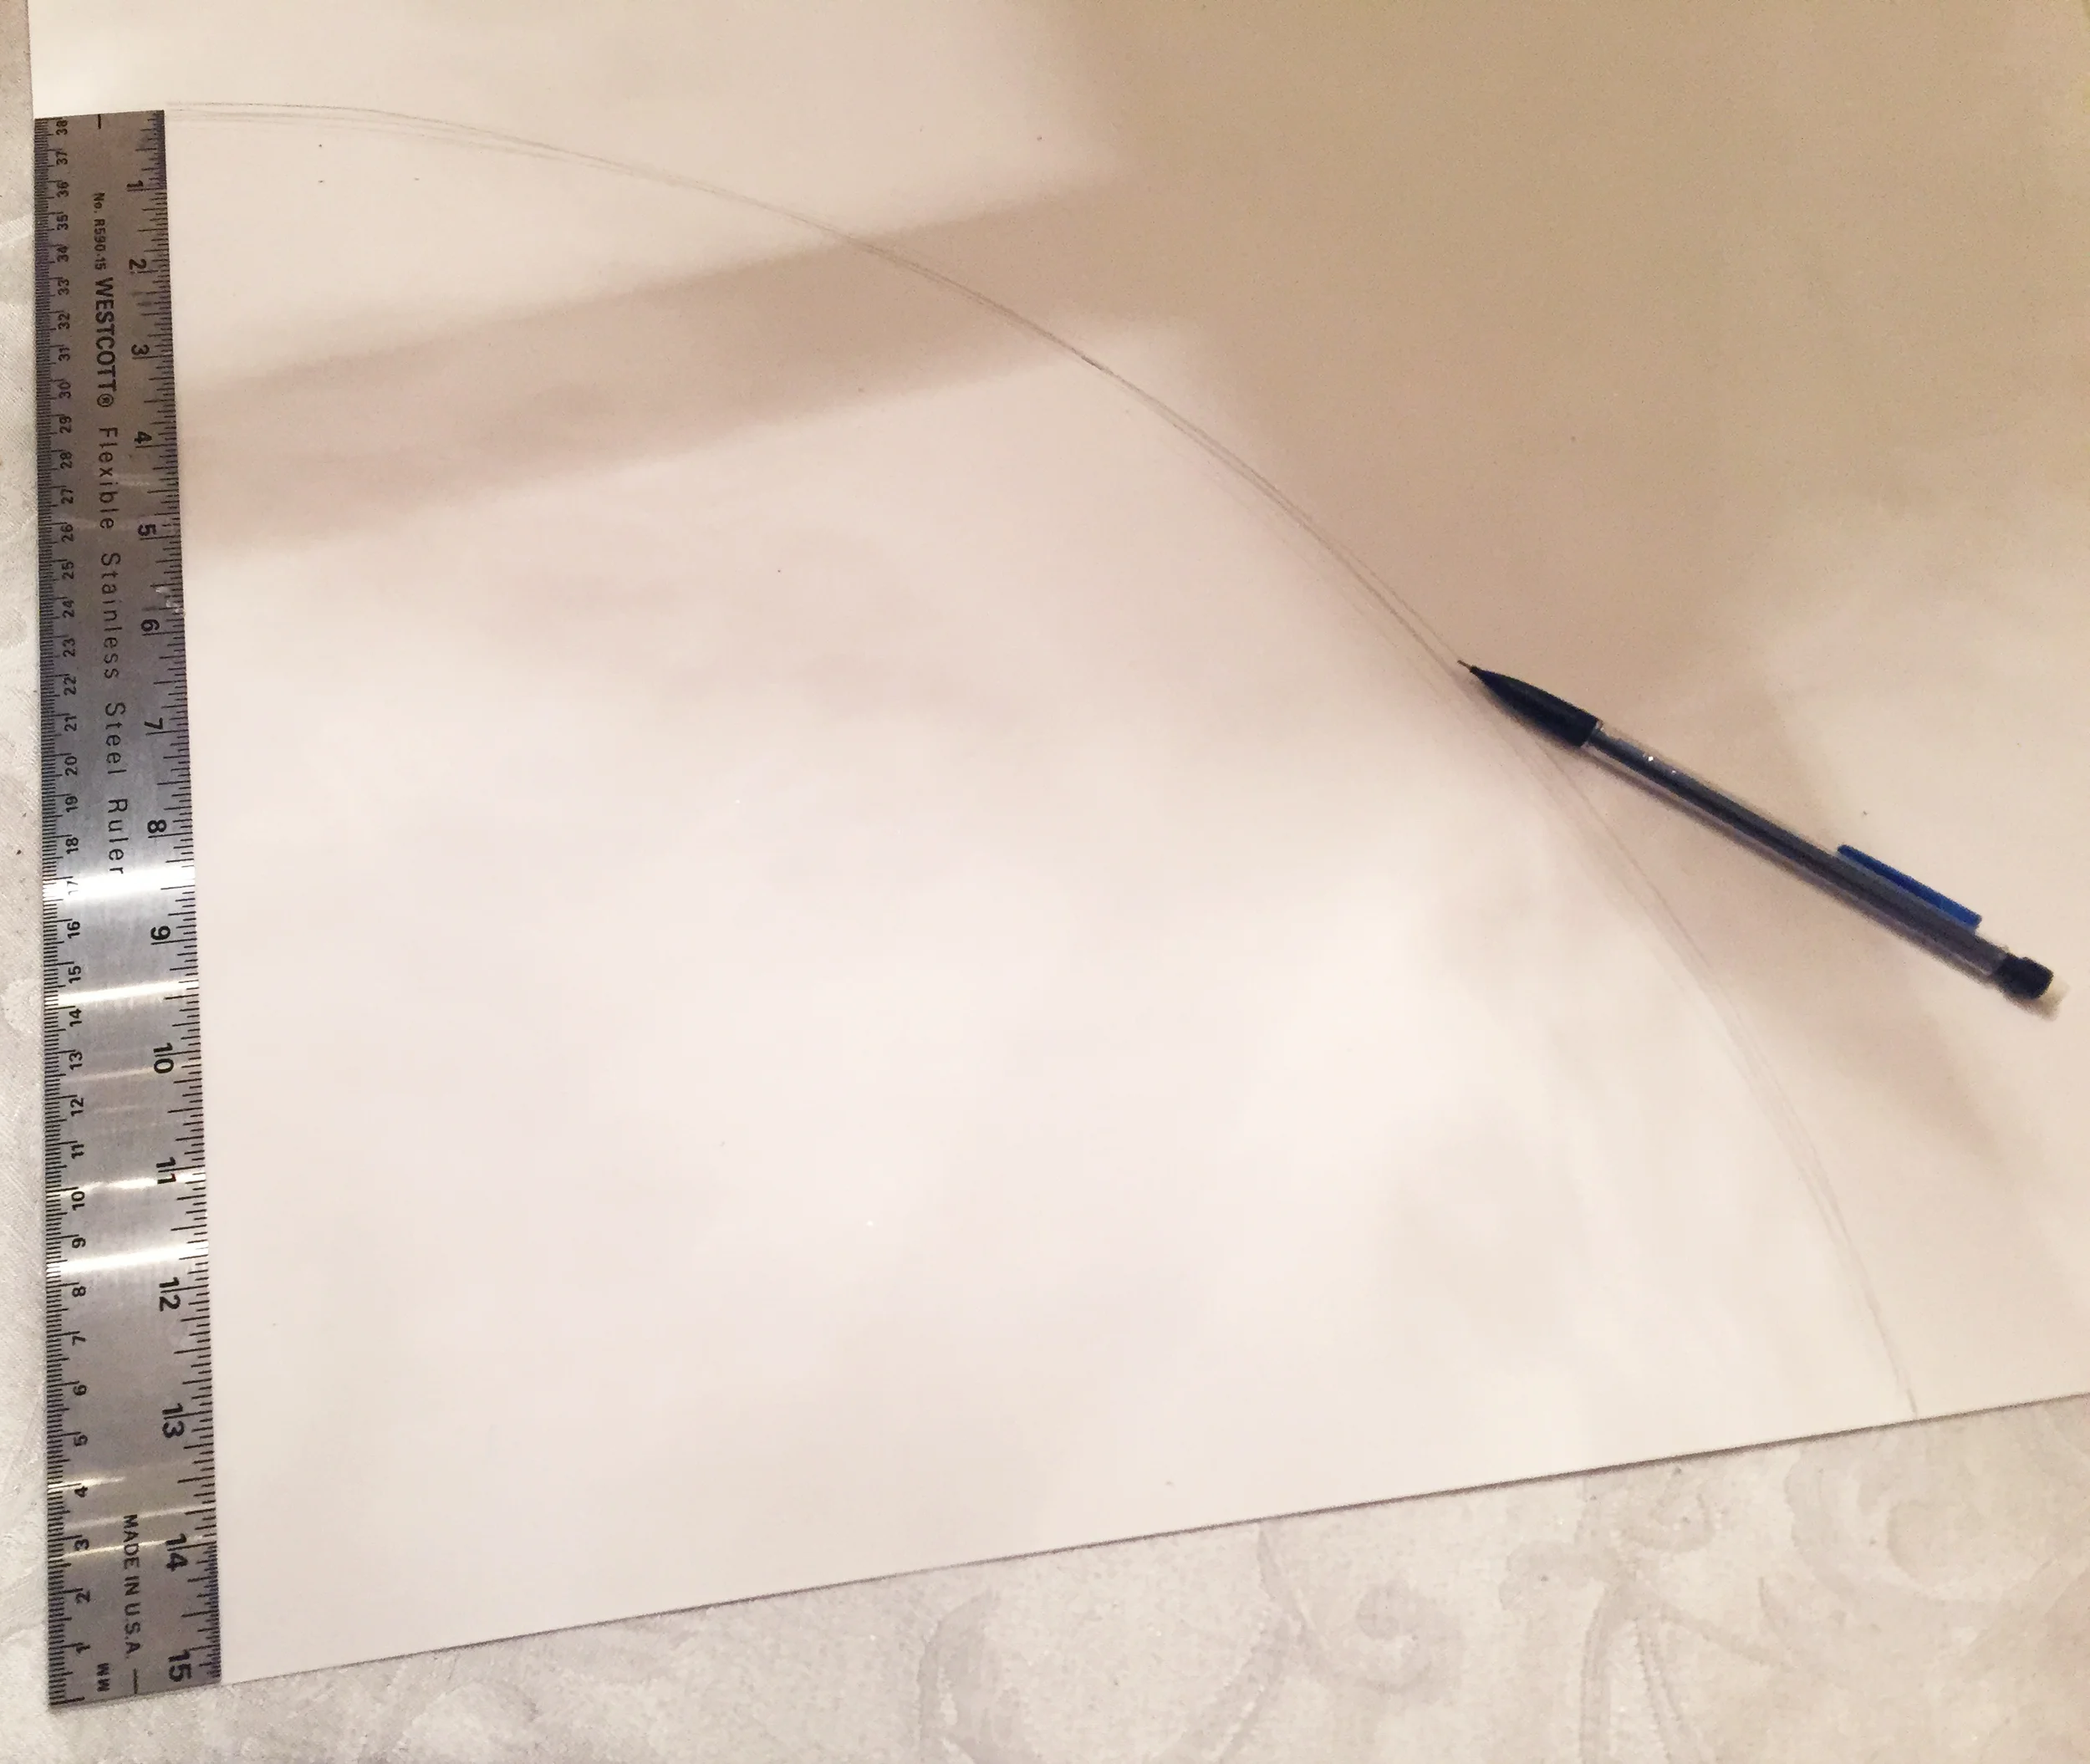
1. Draw quarter-circles on the poster board. Starting at one corner, use a ruler to measure and mark the desired radius at the edges of your poster board. I used 3 different measurements for variety: 12", 15" and 22". Place the ruler at a 45 degree angle from the corner and make a mark at the same distance. Connect the dots to create your quarter circle.

2. Cut out the quarter circle shape and roll into a cone. Hold the cone upright on a tabletop and use both hands to wring the cone until it forms the desired shape.
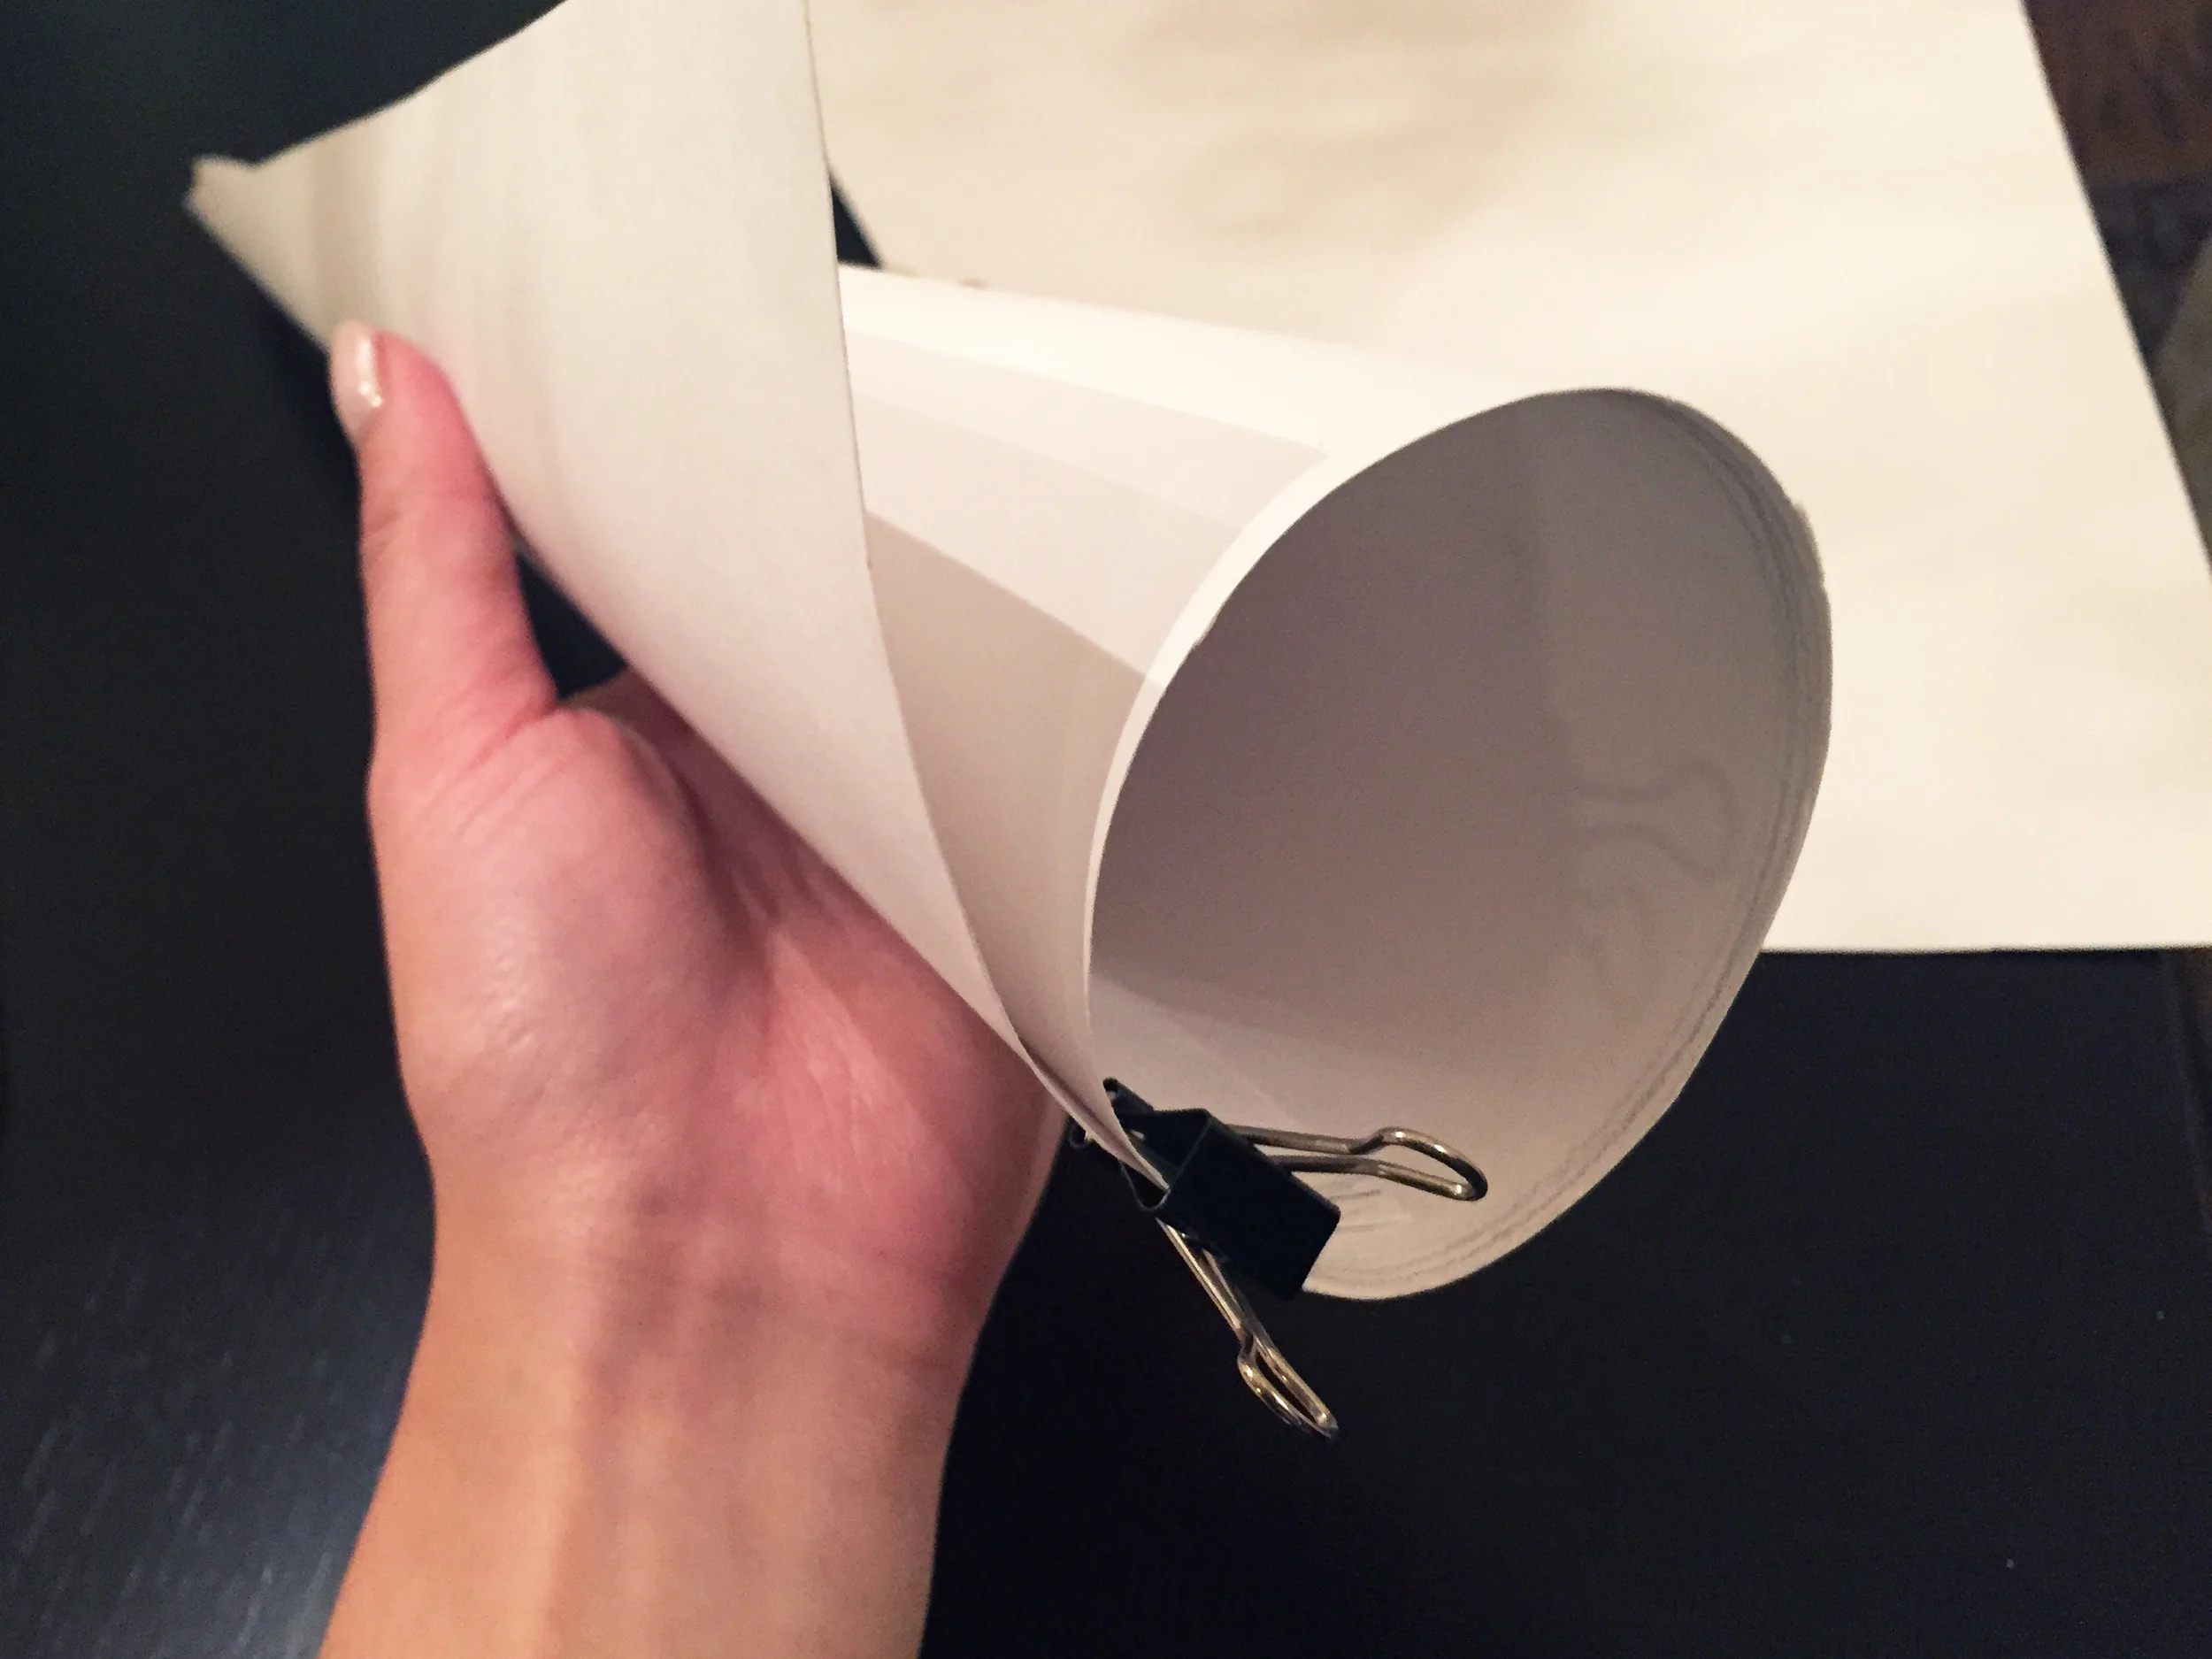

3. Clip the bottom of the cone. This will keep it from unravelling and free your hands to glue the cone shut.
4. Secure with glue. Start at the tip of the cone and work your way down, gluing small sections at a time.
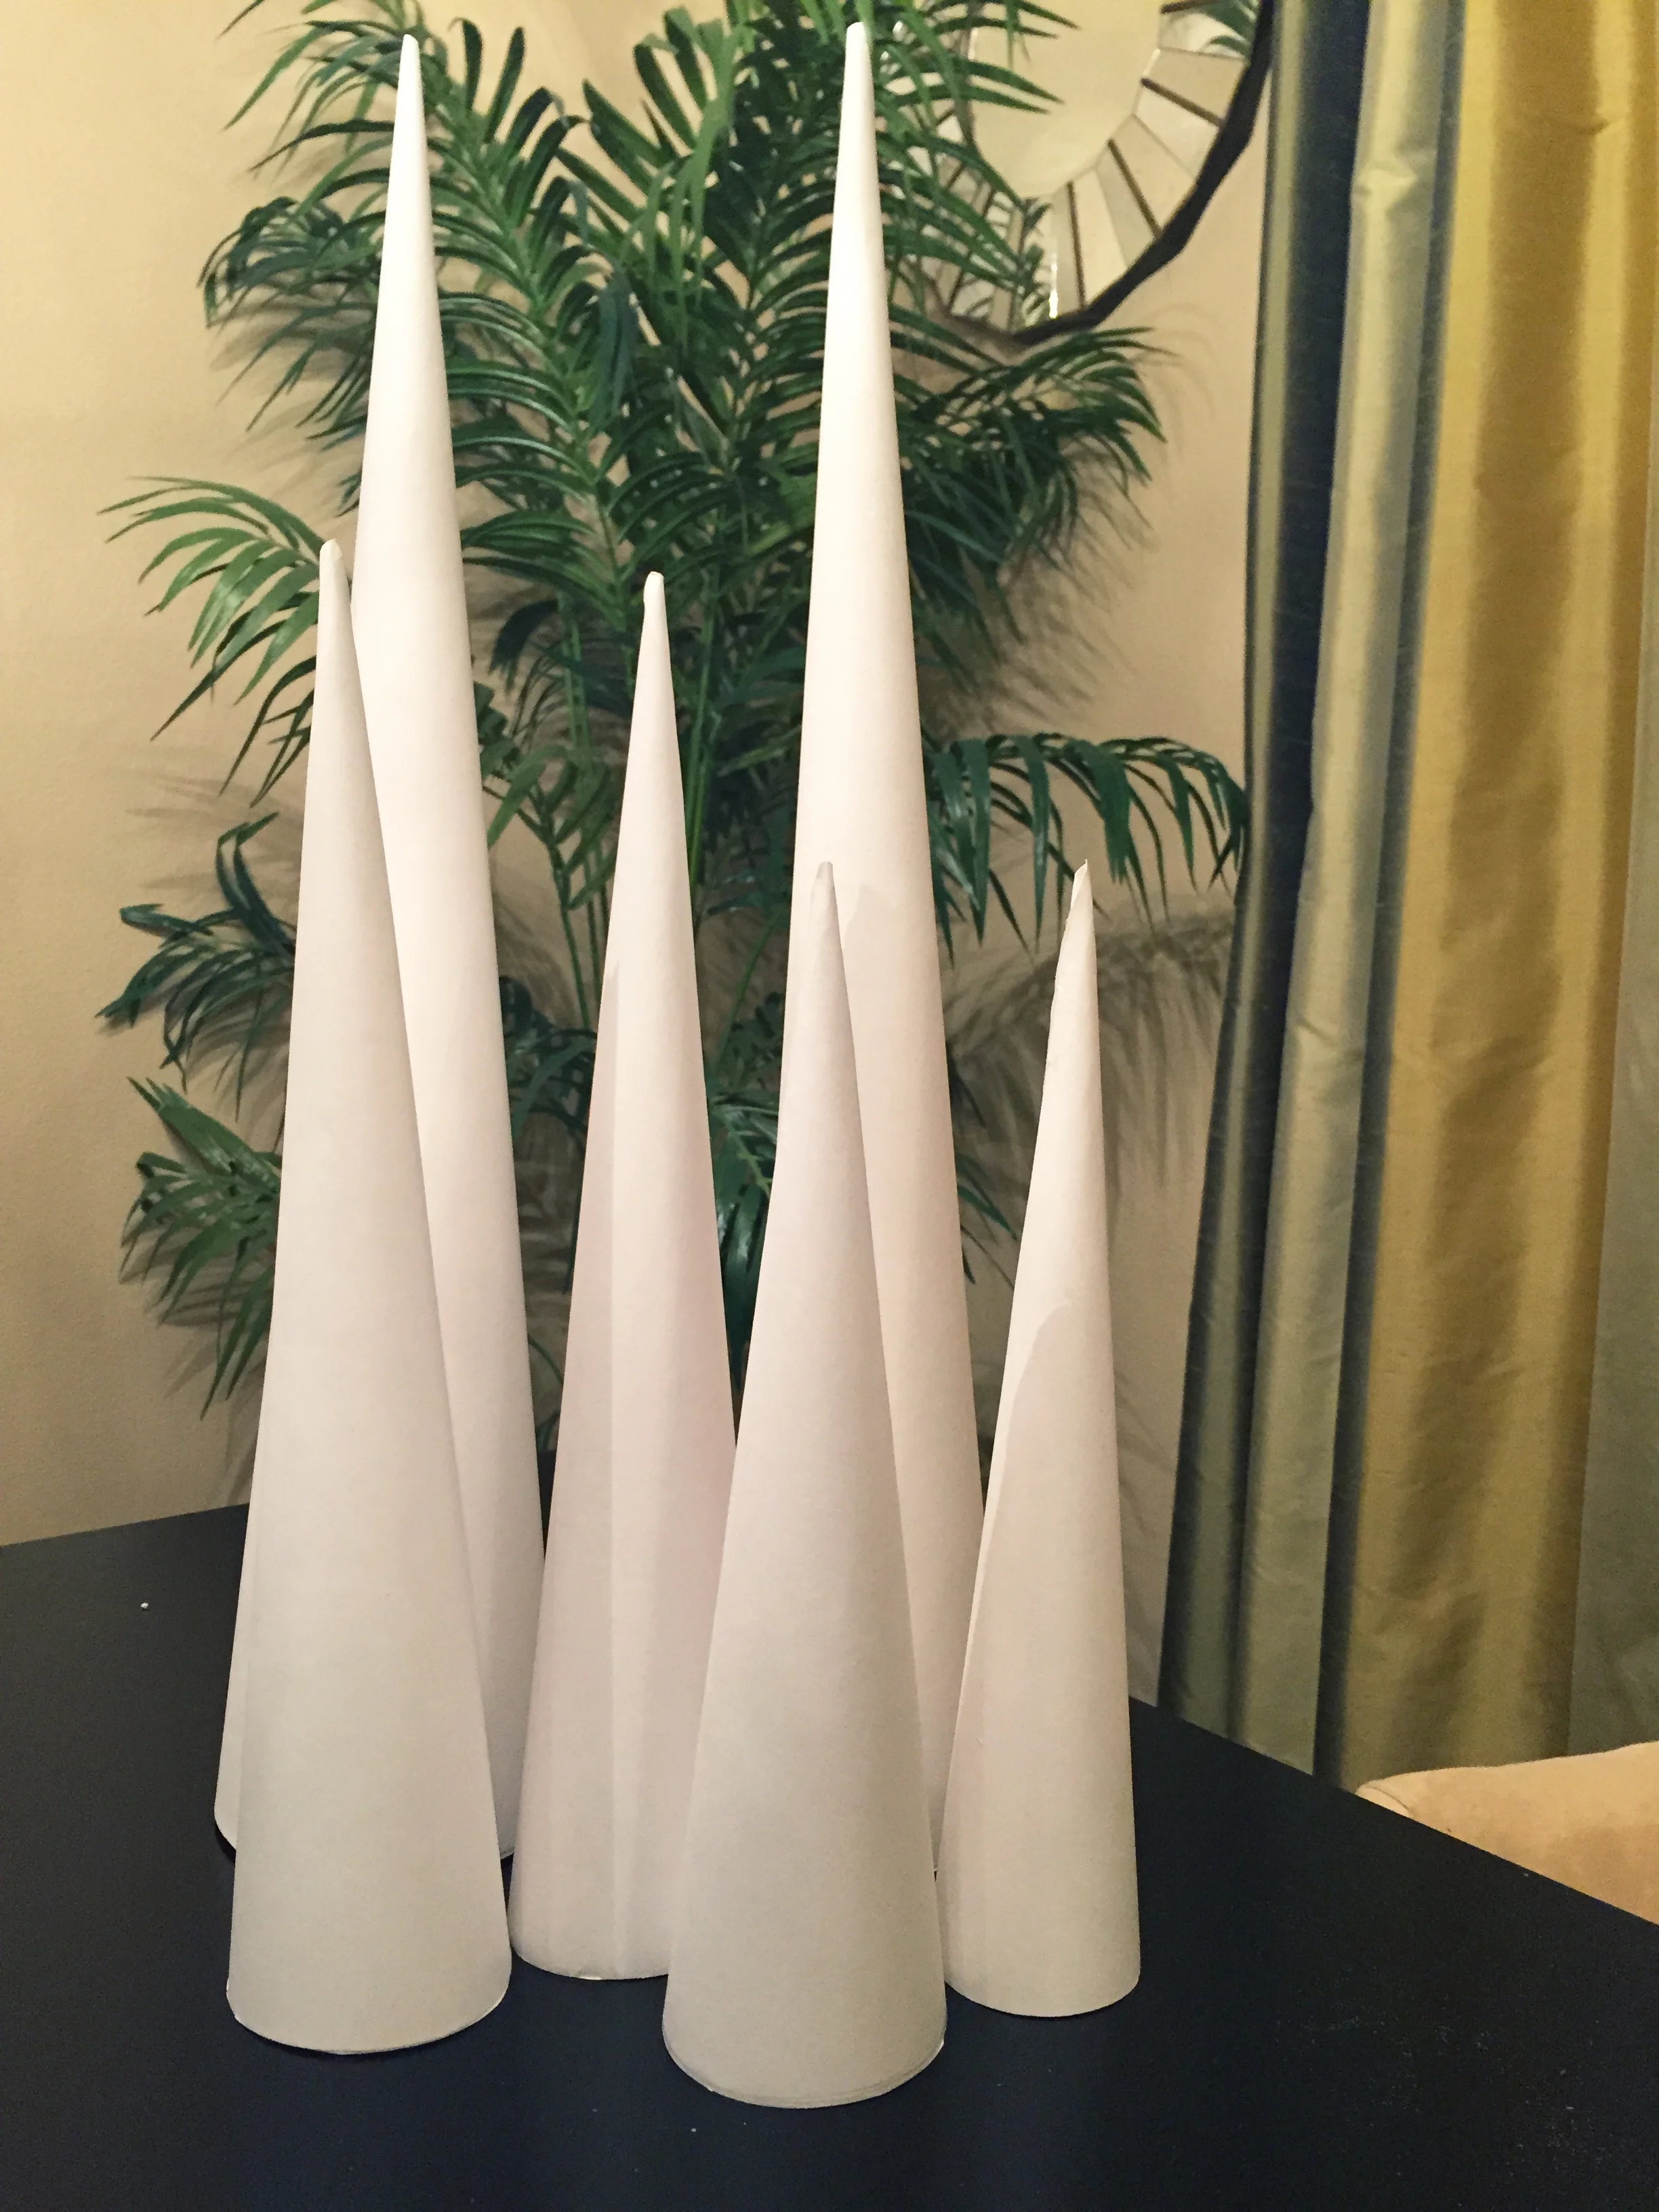
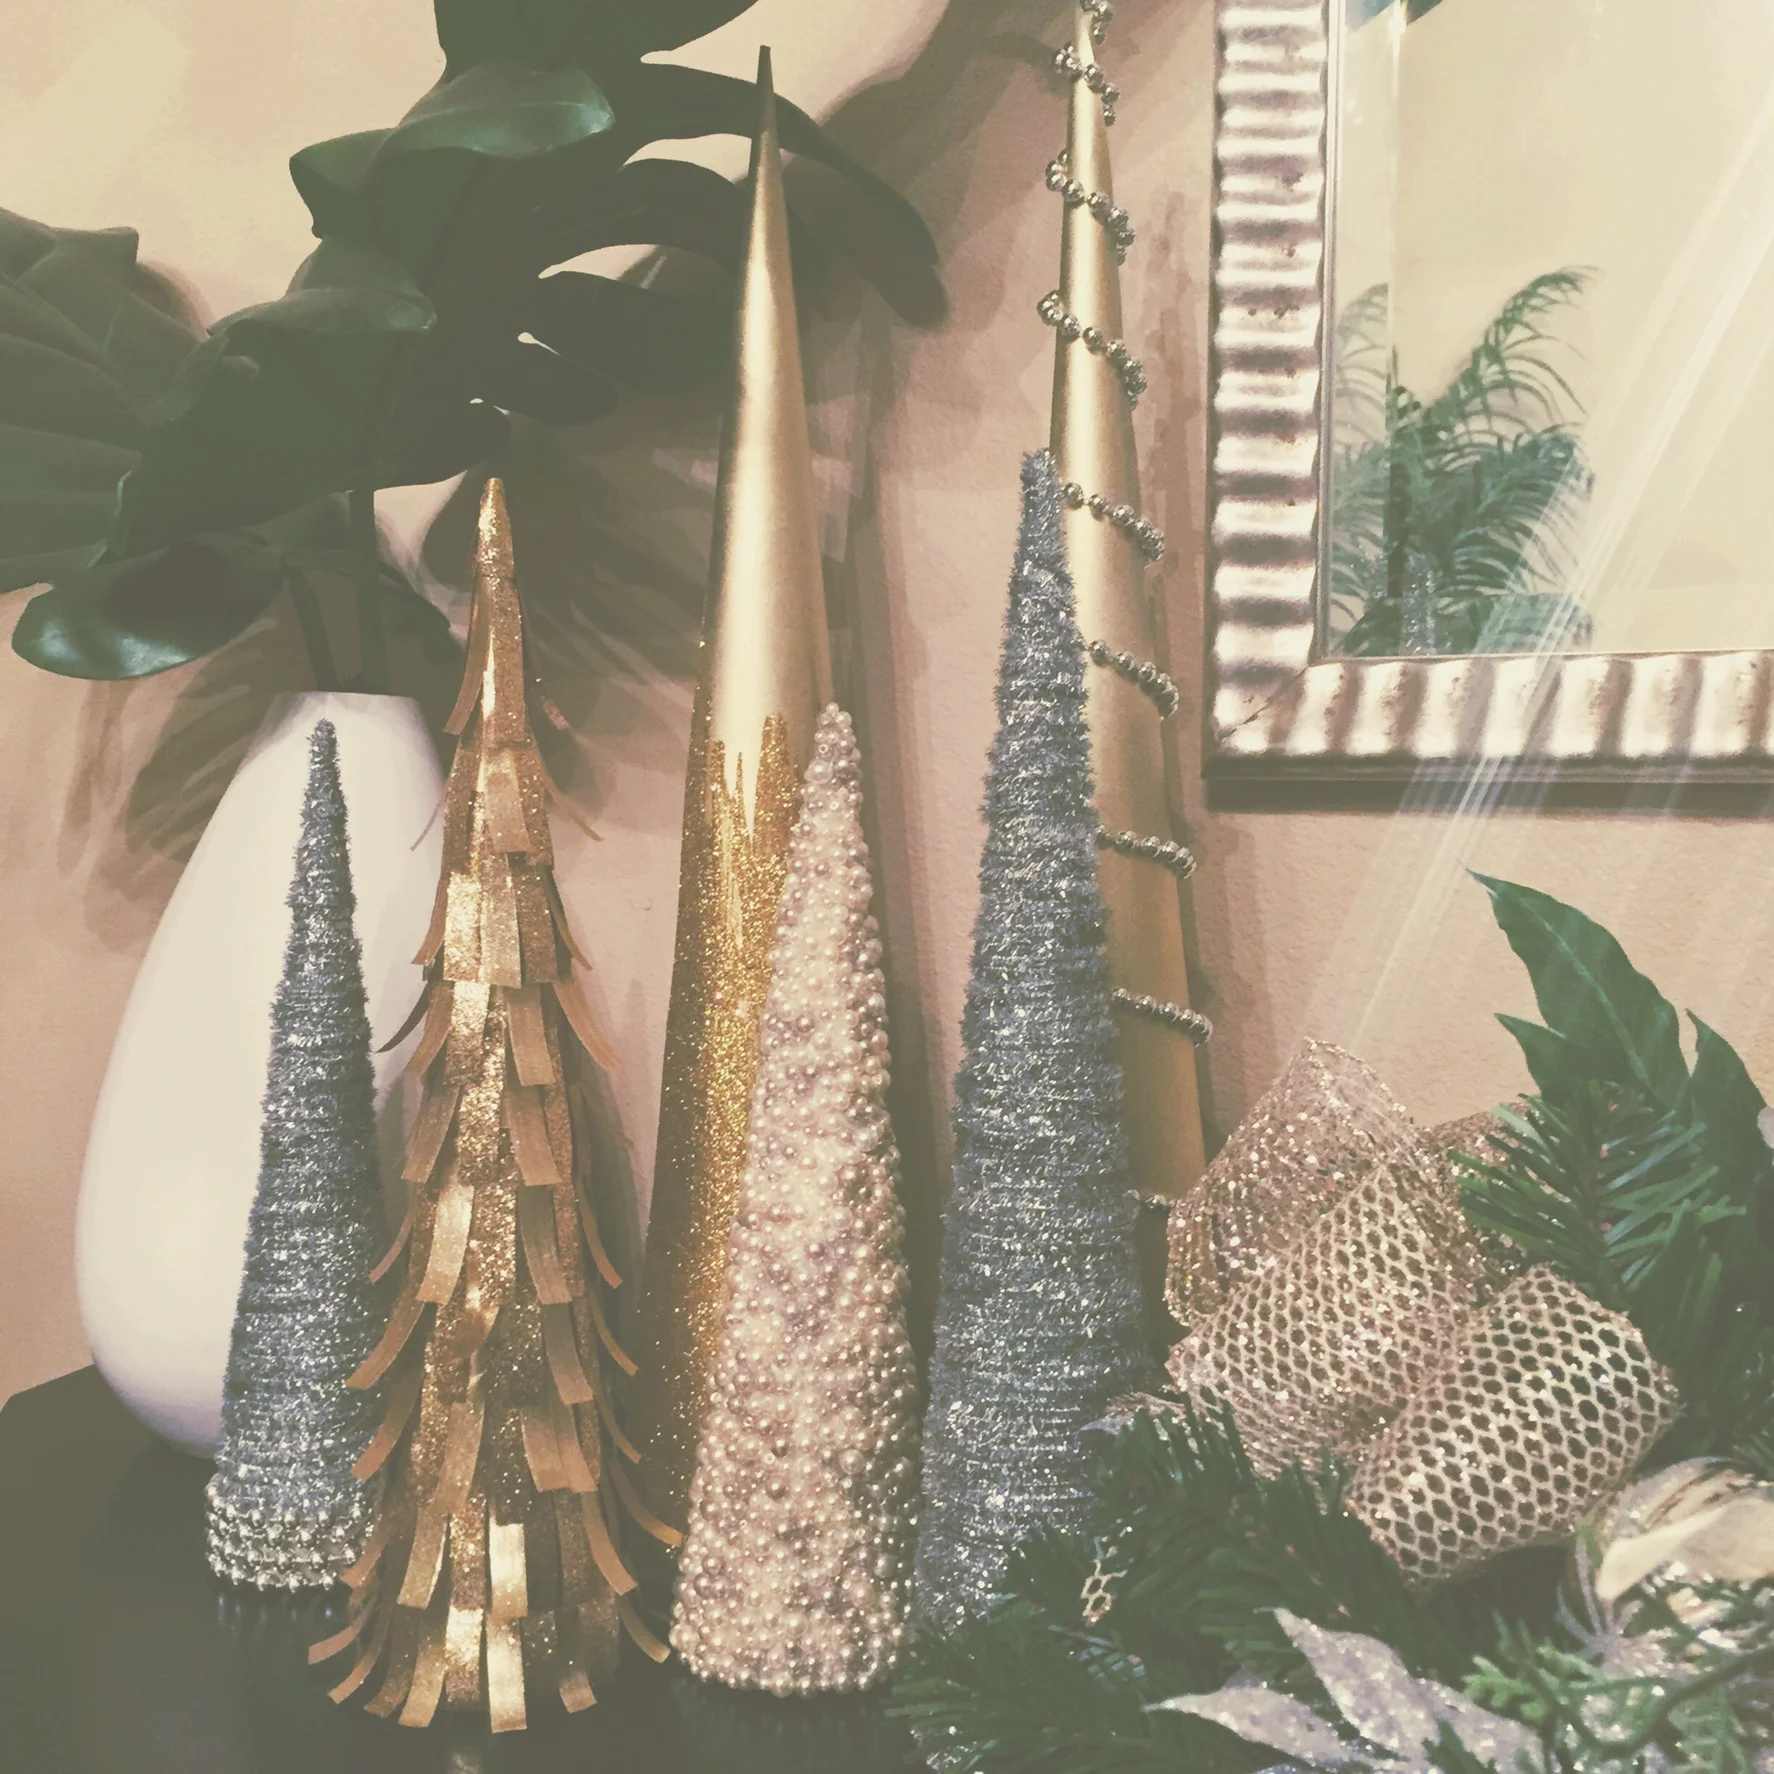
Now they're ready to decorate! The possibilities are endless.
Here's what I put on mine:
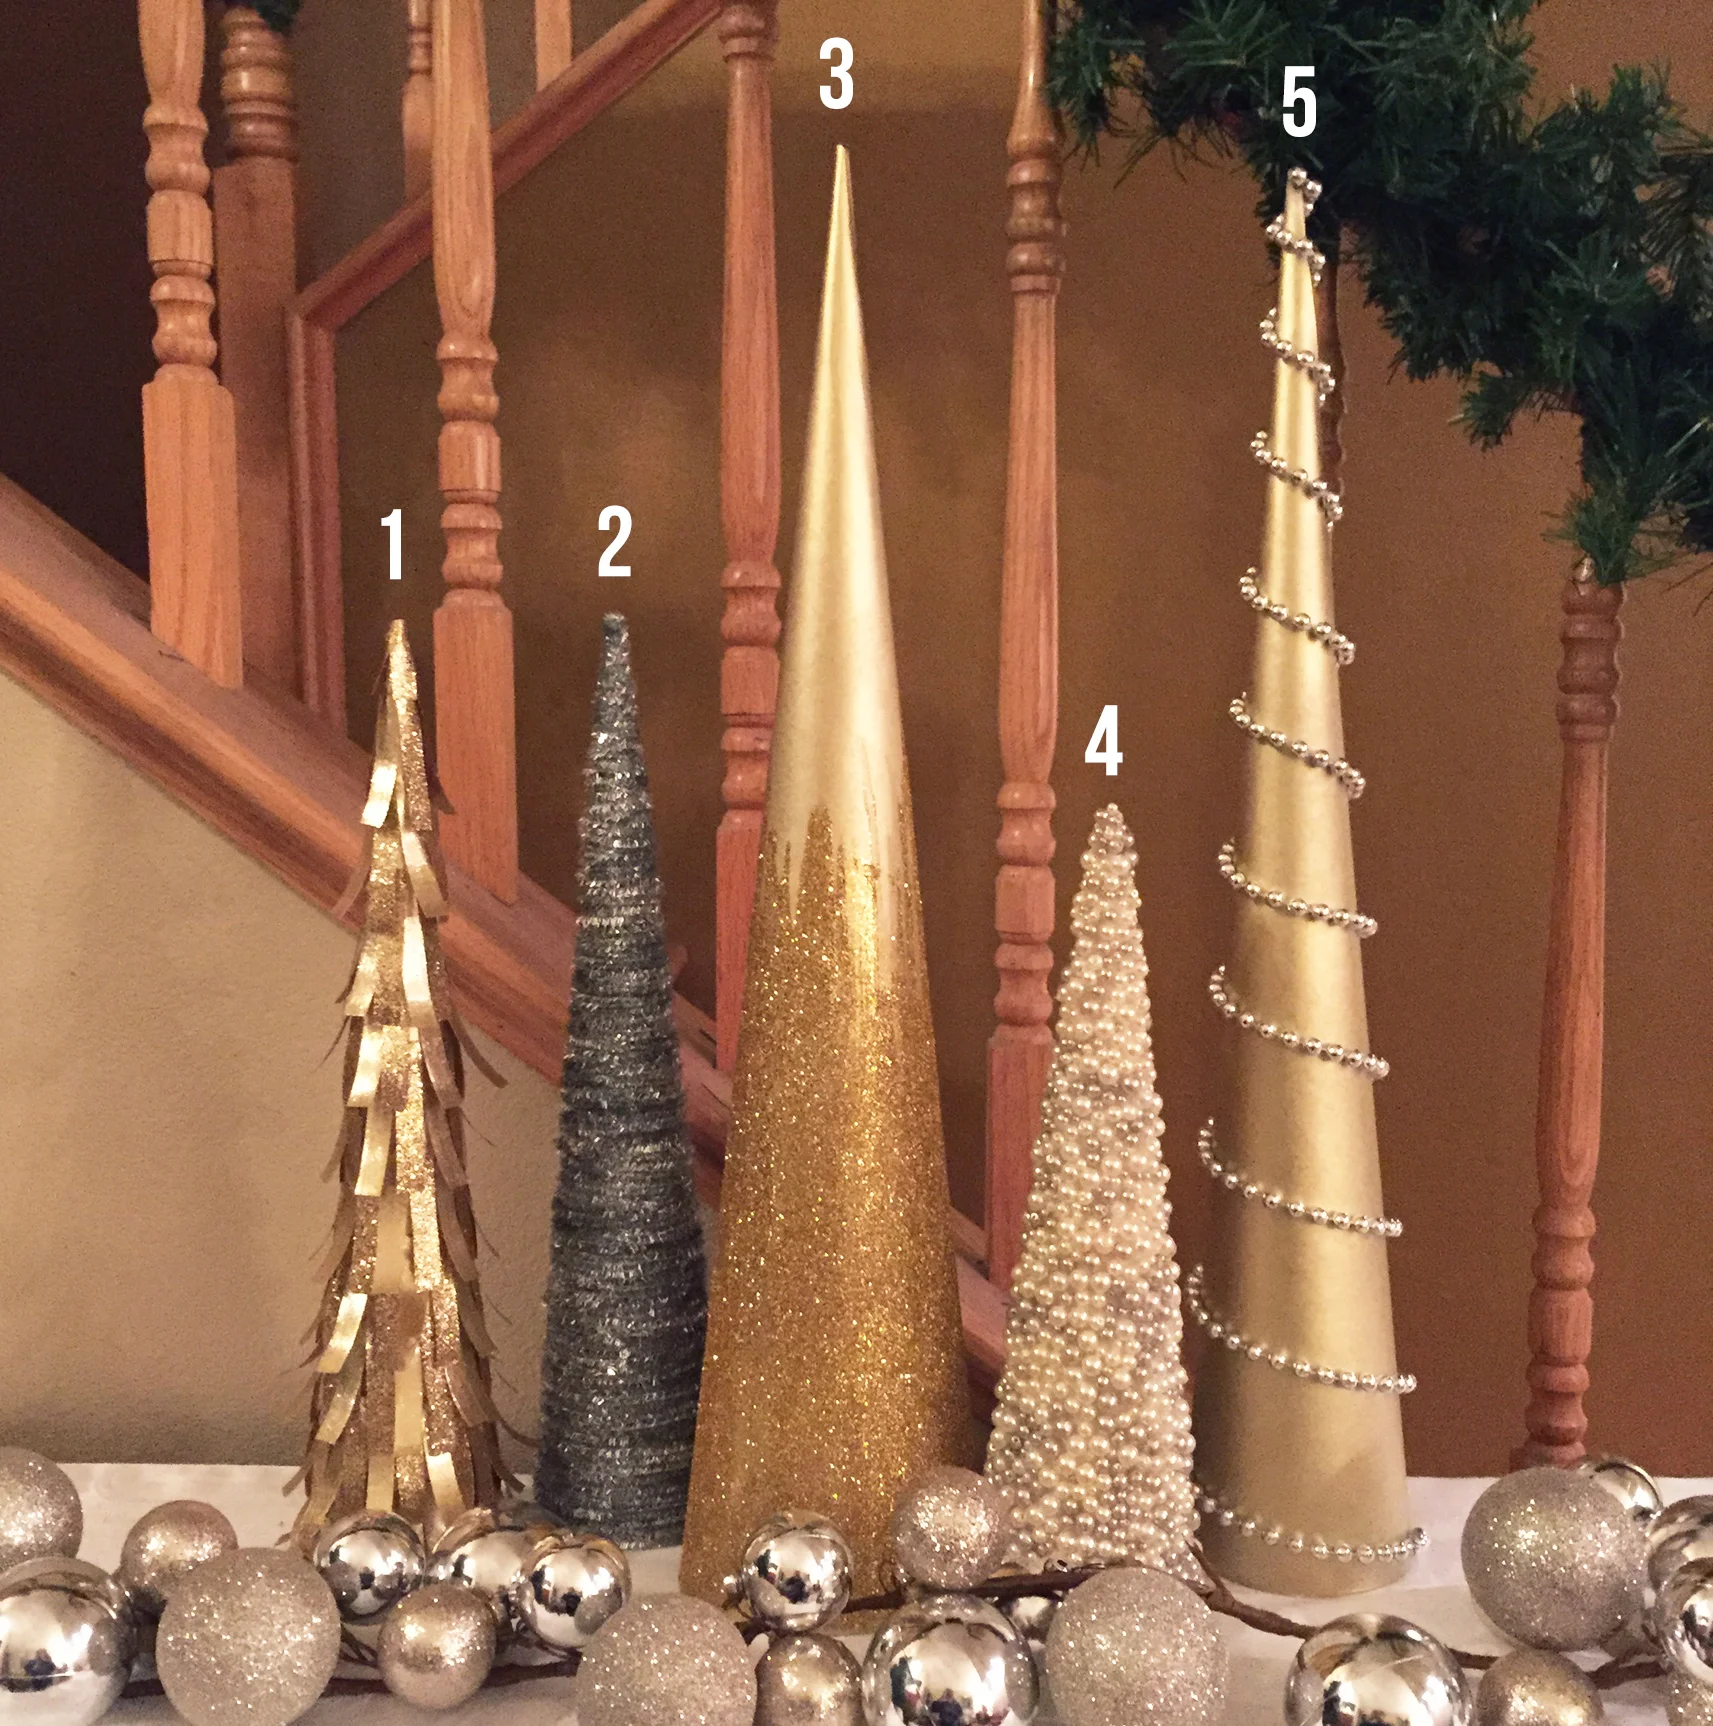
1. Glitter ribbon strips: I cut 2" long pieces of sparkly ribbon and glued them in overlapping layers, starting from the bottom of the cone. For extra dimension, I alternated between using the glittery front of the ribbon, and the back which had a different texture.
2. Silver pipe cleaners: I started by sticking the end of a pipe cleaner in the small hole at the top of the cone to secure it. I continued wrapping the pipe cleaners around, tucking the loose ends under the wrapped pipe cleaner. No glue was needed.
3. Glitter and paint: I coated the cone in gold metallic spray paint, brushed Mod Podge on the bottom half, and sprinkled gold glitter onto the glued area.
4. Pearl beads: Starting at the base, I applied hot glue in small areas at a time, scattering beads over the glued patches. Most time consuming, ever.
5. Paint and bead garland: I spray painted the cone (same as #3) and wrapped the string of beads around in a loose spiral, only applying glue at the ends of the garland.
I also made a sixth (not pictured) that uses the same concept as #2, but wrapped the leftover bead garland around the bottom when I ran out of pipe cleaners.
If you're not interested in investing a ton of time into this, I would suggest choosing trimmings that cover larger surface area (wider ribbon, fabric, faux flowers, etc.). Also, make sure you have enough of each material to cover the entire cone! I chose the tiniest decorations and didn't realize how much would be needed to cover the cones completely.
This made the cones take way more time than I had anticipated, but I don't regret taking on this project at all. I'd rather spend the time exercising my creativity than spend the money to save myself time. And as time-consuming as these were, I love how they all turned out.